Introduction

Still asking users to “open SAP GUI and type the transaction code”? Let’s fix that.

In SAP S/4HANA, you can easily bring a classic GUI transaction directly into the Fiori Launchpad. No rewriting. No backend changes. Just proper configuration.

In this guide, we’ll walk through how to create a Fiori tile for a GUI transaction using semantic objects and target mapping — clean and practical.

Create Fiori tile for GUI transaction in SAP S/4HANA

Business Scenario

You want users to access a standard SAP transaction (T-Code) from the Fiori Launchpad instead of SAP GUI.

Rather than modernizing the program itself, we create a Fiori tile that launches the GUI transaction seamlessly.

If you’re already working on launchpad customization, you may also find our guide on Create Multiple Tiles Inside a Single Fiori App helpful for organizing tiles better within one application container.

Solution Overview

Instead of modifying the backend program or developing a new Fiori application, we solve this requirement purely through Launchpad configuration.

First, we create a Semantic Object to define navigation intent. Then, we create a tile in the Fiori Launchpad Designer and link it to the GUI transaction using Target Mapping.

The result is simple: users click a tile in Fiori, and the classic SAP GUI transaction opens seamlessly inside the Launchpad.

No coding. No enhancements. Just clean configuration.

Step 1: Create a Semantic Object

Every Fiori tile needs a semantic object. Think of it as the logical identifier behind the tile navigation.

Open transaction:

/UI2/SEMOBJ

Go to:

Edit → New Entries

Create:

  • Semantic Object Name

  • Description

Save and assign a transport request.

screenshot1

Step 2: Create Tile in Launchpad Designer

Now that the semantic object is ready, we move to the Fiori Launchpad Designer to create the tile.

Open transaction:

/UI2/FLPD_CUST

Transport addition: to capture ethe changes into TR, click on settings and provide the customizing TR.

Select the catalog where the Tile needs to be added.

Click on right hand side “+” button to create a Tile.

Select the Static/Dynamic tile, based on requirement.

Step 3: Create Target Mapping

Select the tile and click on Target Mapping.

Click Create Target Mapping.

Enter:

  • Semantic Object (created in Step 1)

  • Action (create / change / display)

The action should match the nature of your transaction.

Click Configure.

Set:

  • Application Type = Transaction

  • Transaction Code = Your T-Code

  • Semantic Object and Action

Save.

Step 4: Maintain Semantic Object and Action in Target Mapping

Now that the tile is created, the next important step is configuring the Target Mapping correctly.

Select the tile you created and navigate to the Target Mapping section.

Click on Create Target Mapping.

Here, enter:

  • Semantic Object → The one created in Step 1

  • Action → create / change / display (based on your transaction requirement)

The action defines what type of intent the tile represents.
For example:

  • Display transaction → use display

  • Change transaction → use change

Be consistent. If the semantic object says “SalesOrder”, the action must logically match the purpose.

Step 5: Configure Application Type and Transaction Code

After entering the semantic object and action, click on Configure.

Now you will maintain the technical navigation details.

Enter the following:

  • Semantic Object → (same as previous step)

  • Action → (same as previous step)

  • Application Type → Transaction

  • Transaction Code → Your required T-Code

Make sure Application Type is selected as Transaction.
If this is wrong, the tile will not launch the GUI transaction properly.

Save the configuration.

scr6

Step 6: Assign Tile to a Group

Creating a tile in the catalog does not automatically make it visible to users.

To display it on the Launchpad, you must assign it to a Group.

Navigate to the Group section in FLPD_CUST.

Click on “+ Add Tile”.

Select:

  • The Catalog created earlier

  • The Tile you just configured

Add it to the required group and save.

Now the tile becomes visible to users assigned to that role.

Add the Tile that was created in above steps.

Why This Approach Is Useful?

This method allows you to modernize user access without touching ABAP logic. It’s fast, transportable, and completely configuration-based.

If your requirement goes beyond navigation and involves UI behavior control, you might want to explore our article on Status Flow on Fiori App, where we handle dynamic behavior at the UI level.

And if your scenario involves backend logic updates instead of tile configuration, you can also read Update Sales Delivery Document Header and Item Fields using Enhancement for enhancement-based control.

Common Mistakes Developers Make

❌ Forgetting to create the semantic object first
❌ Using a wrong action name
❌ Not assigning transport request
❌ Selecting wrong application type (must be Transaction)
❌ Creating tile but not assigning it to a group

Frequently Asked Questions

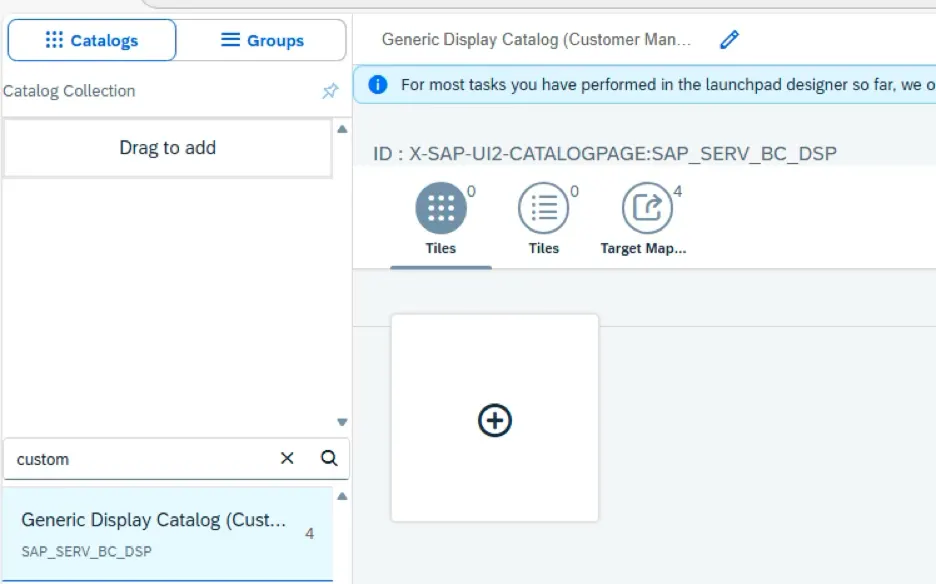
 Does this convert GUI transaction into a Fiori app?

No, it only launches the GUI transaction inside Fiori.

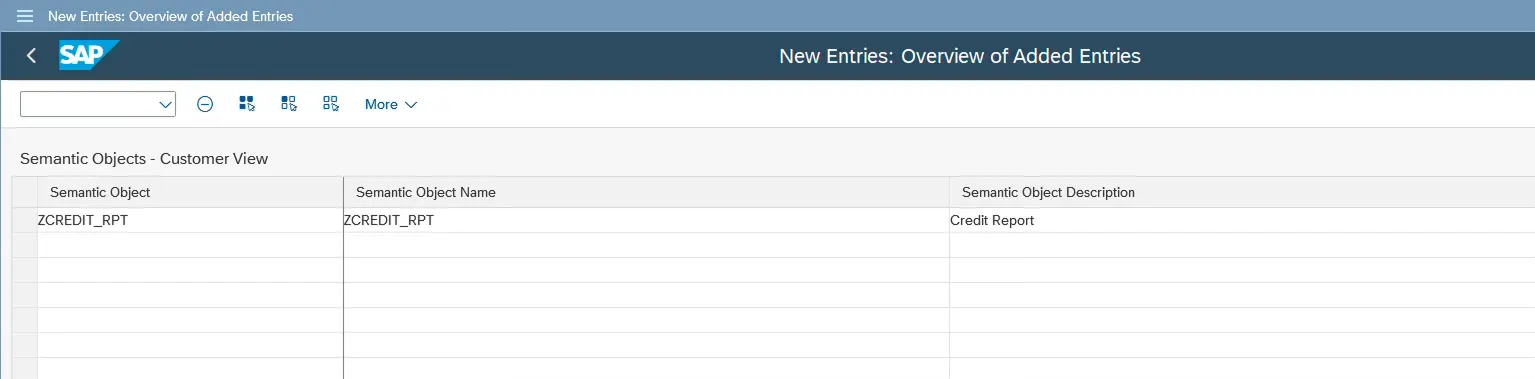
Can I use the same semantic object for multiple transactions?

Yes, but actions must be unique.

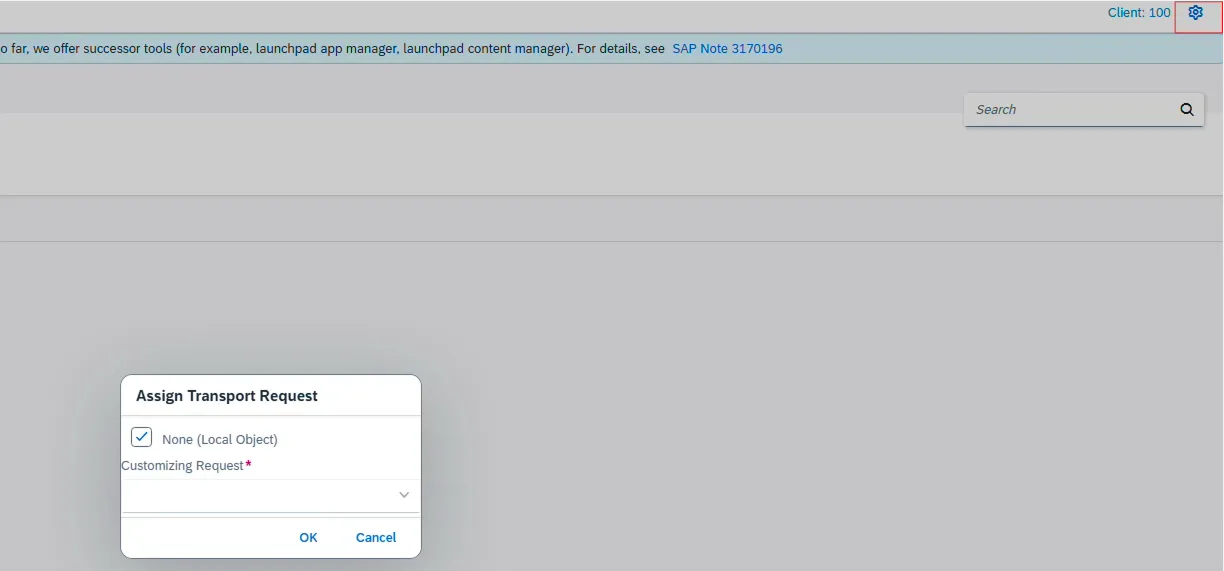
Is development required for this setup?

No, this is configuration only.

🎉 Final Thoughts

Sometimes modernization doesn’t mean rebuilding everything.
Creating a Fiori tile for a GUI transaction is a simple but powerful usability improvement. It reduces user confusion and keeps everything inside the Launchpad.

Small configuration. Big impact.

Share article

Kishore Thutaram

"SAP solution architect with a strong problem-solving mindset, sharing practical SAP S/4HANA and ABAP insights from real-world projects."

https://fiowelt.com

Leave a Reply

Your email address will not be published. Required fields are marked *